
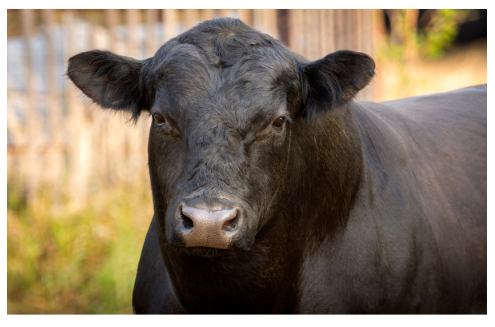
Lost Tags: Why DNA Testing is the Detective of the Cattle World
Lost Tags: Why DNA Testing is the Detective of the Cattle World
The first step is to re-tag the animal in question and collect a new DNA sample. To avoid confusion with existing tag numbers in your herd, consider assigning a unique identifier with a prefix or suffix. For example, you might use “NT154” (where “NT” stands for “No Tag”) or “UNK154” (for “Unknown”). This ensures the new tag number stands out from the rest.
Most ranchers have extra tags on hand—unused ones with pre-assigned numbers from previous orders. These tags are perfect for this situation and can help streamline the re-tagging process.
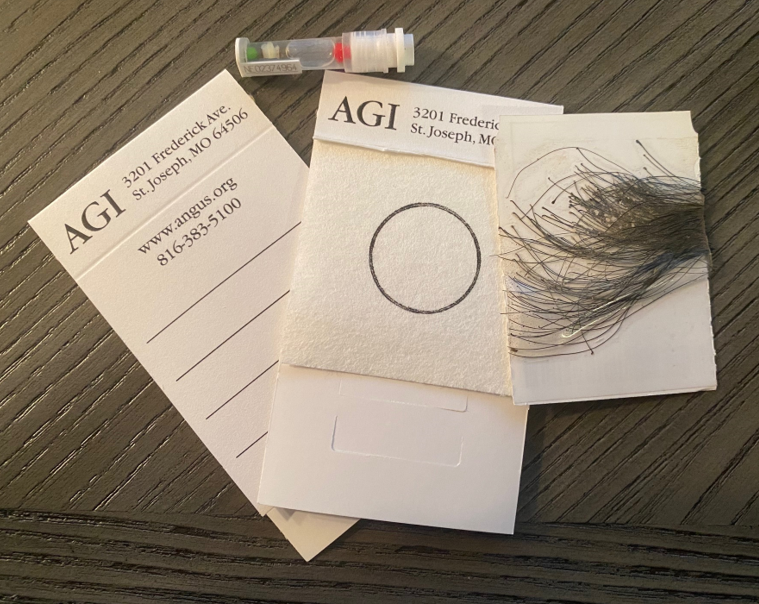
Once the animal is re-tagged and you have collected a DNA sample—whether using a blood card, TSU (Tissue Sampling Unit), or hair sample—you’re ready to start identifying the animal. Log in to the Association's AAA Login and navigate to Submit Data > AHIR / Performance > Calving Book. On the criteria screen, the specific selection doesn’t matter for this process, as we won’t be using the resulting data. By default, the system is set to All Eligible Dams, which we’ll use for this example.
When the list appears, click the Get Dam by Tag/Add Dam button. This will open the Calving Book screen, but it will be blank.
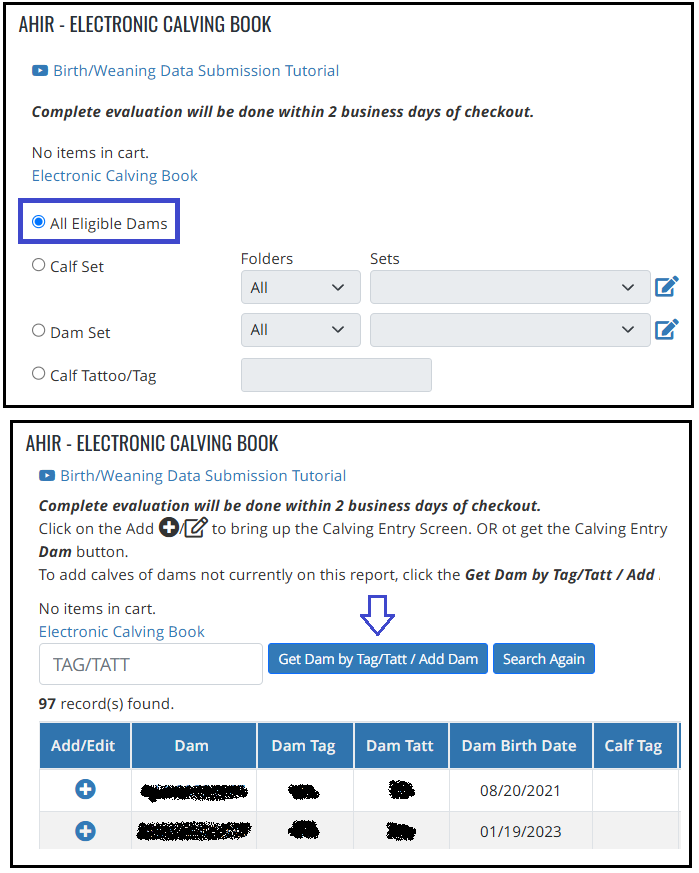
This is a common question I get from producers: How do we create a record to figure out the identity of an animal?
There are two effective approaches I’ve found. It’s important to note that a calving record must have both a dam and a sire attached to it. Let’s start with the sire. You can either select one of your herd sires or, if applicable, a sire group.
For the dam, if you’ve used a donor dam, you can input its information and mark the calf as an ET (embryo transfer). This ensures there won’t be conflicts with other calves.
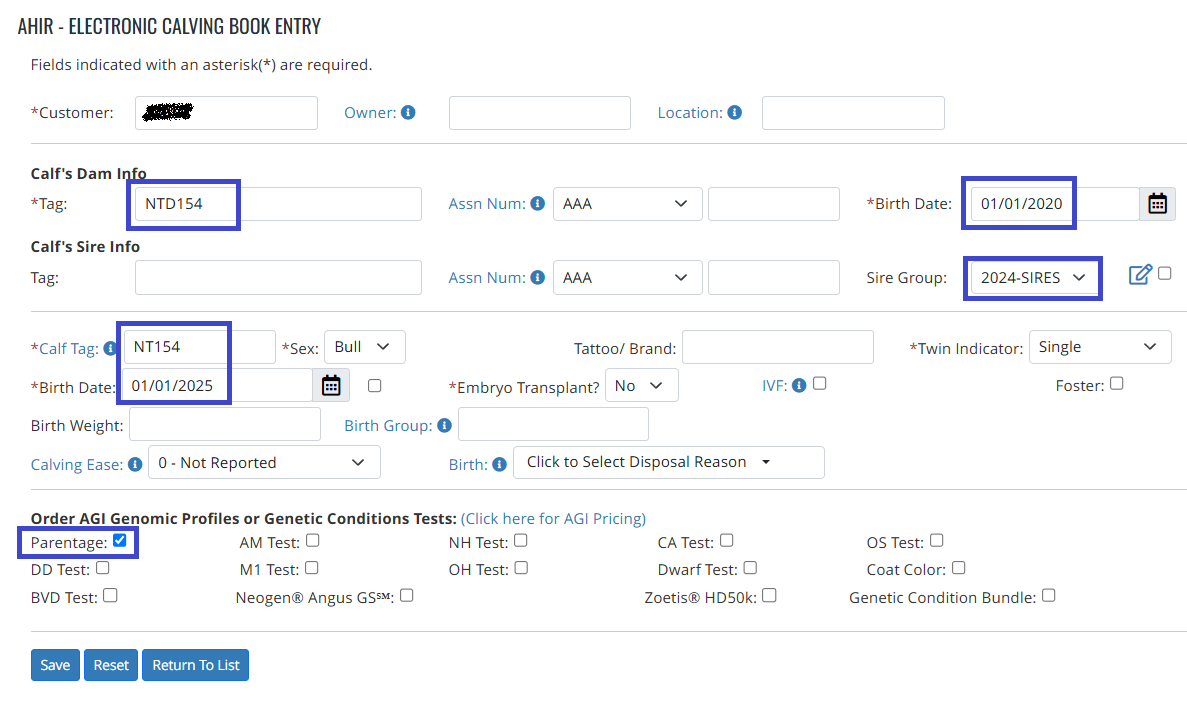
However, to avoid confusion, I prefer creating a new commercial dam for the record. For example, if the calf’s tag is NT154, I would assign the dam the identifier NTD154. Leave the Association Number blank and use a generic birth date, such as 01/01/2020.
The prefix NTD stands for “No Tag Dam,” followed by the calf’s unique identifier (e.g., 154). This makes it clear that the dam is a placeholder for the purpose of identifying a lost tag. If you’re enrolled in Inventory Reporting, it’s also easy to remember to dispose of these placeholder dams before your re-enrollment period.
Once you’ve entered the dam information, proceed to complete the record. Input the calf tag (NT154), the animal’s sex, and assign a placeholder birth date, such as 01/01/2025.
This method helps maintain clarity and ensures you can track and resolve tag issues effectively.
At this stage, an important question to ask yourself is whether to order just a parentage test or a full genomic profile. The cost of a parentage test is $18.00, while a Genomic Profile (which includes parentage) is $37.00.
If your operation has a solid policy of testing all animals you plan to keep and you're working with an older animal, it might make more sense to stick with the parentage test. On the other hand, if the animal is younger and you’re unsure whether it already has a genomic profile on file, ordering the full genomic profile could be the better option.
Ultimately, this decision will depend on your operation’s needs and the specific circumstances of the animal in question.
Once you’ve saved the request to your cart, proceed to check out to submit it to the Association. After checking out, you’ll receive a confirmation screen. Be sure to print this confirmation and include it with the sample before sending it to AGI. The address for AGI will be provided on the confirmation.
When mailing samples to AGI, I recommend using USPS with tracking. My go-to method is USPS Priority boxes, which typically cost around $10. This option provides tracking information so you can monitor the shipment’s progress and ensures delivery within 2–3 days in most cases.
Once AGI receives your sample, they will process it and send it to the lab. After this step, the test request will appear in DNA > Test Results > View Results.
To help expedite the process when the results return from the lab, there are a few steps you can take. If the animal is younger, you may already know its birth year. Use this information to narrow down which sires were used during that time. Be sure to consider both your walking sires and any AI sires included in your breeding program.
If it’s an older animal, such as one of your mature dams who lost their tag and has an unreadable tattoo, you’ll need to generate a list of potential sires by referencing your active dam list.
One effective approach is to use a combination of Animal Sets and Custom Animal Reports. Here’s a high-level overview: Start by creating a new animal set using the Active Dams option. Once the set is created, navigate to the Custom Animal Report feature. Use this tool to return a list of all active dams, along with their sire registration numbers and sire names. Export this data to Excel, where you can use sorting and removing duplicate tools to create a unique list of sires for your active dams. This method is efficient and provides you with a clear list of potential sires in a short amount of time.
If you’d like more detailed instructions or assistance with this process, feel free to reach out—I’d be happy to walk you through it.
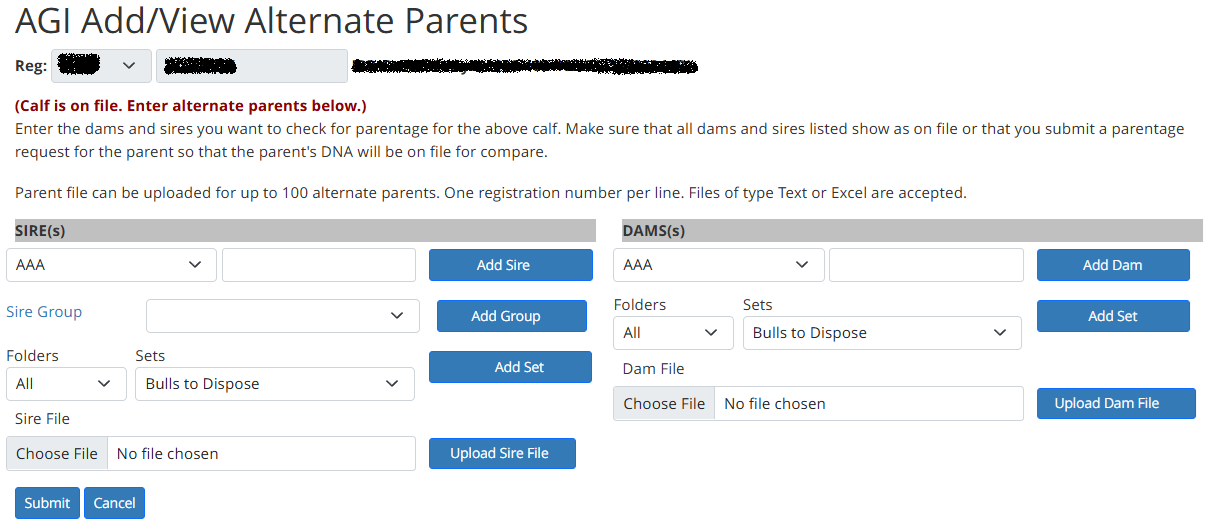
Once you have the list of sires you want to test against, navigate to DNA > Test Results > View Results to drill down and add the sires for comparison.
You can follow a similar process for selecting the dams you’d like to test against. Keep in mind that there’s a limit of 100 alternate parents that can be added at a time. If you need to test against more than 100 dams, you’ll need to upload multiple files. After uploading the first file, complete the checkout process, obtain the confirmation, and then repeat the process for the next batch.
Once all the sires and dams have been loaded for testing, all that’s left is to wait for the results to come back.
I also recommend setting a reminder to check on the results. This can be as simple as writing a note and sticking it to your refrigerator or as structured as scheduling a reminder in your calendar. Tracking when the sample was sent to the lab and scheduling a follow-up will help you stay organized.
If you’re lucky, when the results come back, they’ll match one of your alternate sires and dams, helping you identify the animal.
If the results don’t provide a match, reach out to someone at AGI and explain the situation, including the steps you’ve taken so far. They may be able to offer additional guidance or assistance to help resolve the issue.
Once the animal is successfully identified, you can proceed with re-tagging it with the correct tag to maintain your herd’s accuracy
In conclusion, while identifying an animal with a lost tag or unreadable tattoo can be a bit challenging, there are several methods and tools available to help you track down its identity. By using a combination of DNA testing, thorough record-keeping, and careful analysis of your sires and dams, you can resolve most identification issues efficiently. If needed, AGI is there to assist you should you encounter difficulties along the way. Stay organized, and don’t hesitate to utilize available resources to keep your herd’s records accurate and up to date.