
Unlocking Efficiency: Managing Your Data Submissions and Account History with Ease
Unlocking Efficiency: Managing Your Data Submissions
and Account History with Ease

Refining Your Results: Getting the Most from Search and Filter Options
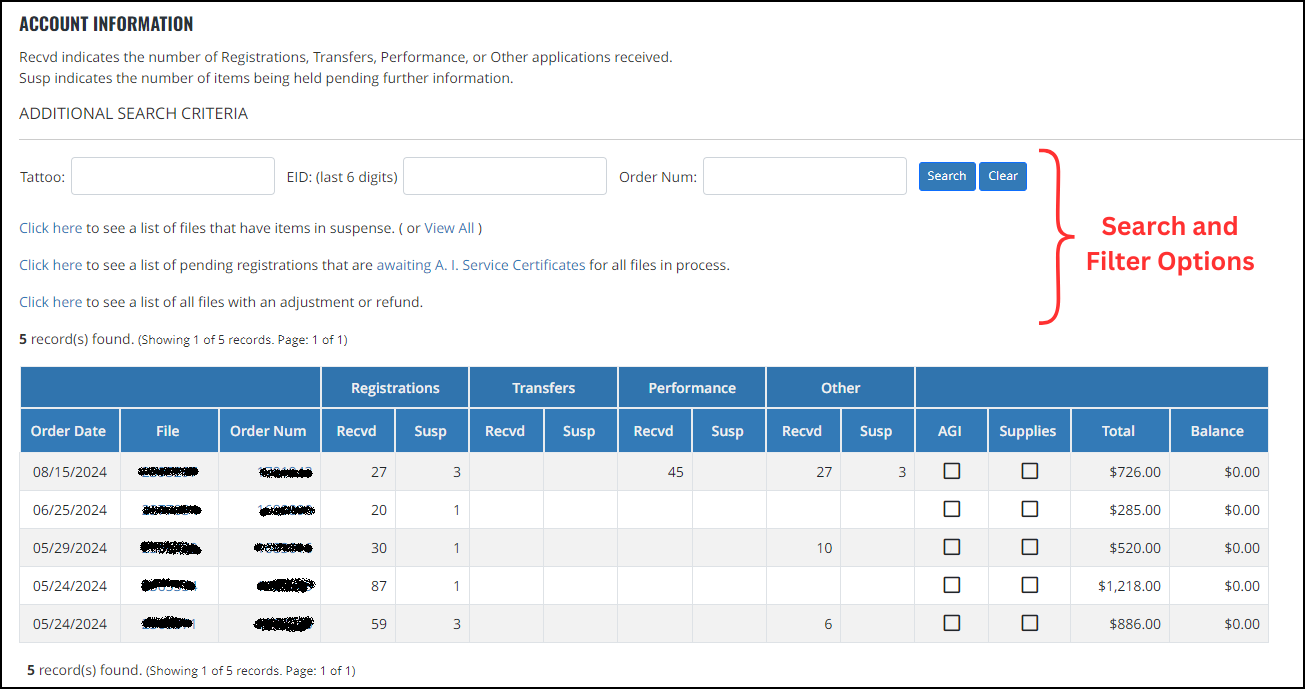
The first feature worth noting is the variety of search criteria available at the top. These filters allow you to quickly narrow down your results based on specific details like tattoos, EIDs, or Order Numbers. For instance, if you're looking for a particular tattoo, you can input that information to swiftly locate the corresponding files. Keep in mind that if a tattoo has been submitted through multiple files—say, for calving records, weaning weights, and registrations—all related file numbers will be displayed. Clicking on a file allows you to scroll down and see the specific row where that tattoo appears, highlighted for easy identification. This feature is particularly helpful for checking the status of a registration, including whether it's pending any additional requirements like an AI Certificate.
Additionally, the Order Number search option is incredibly useful if you save your order confirmation printouts. It allows you to jump directly to the specific file associated with that order, making it easier to track and manage your submissions.
If you're dealing with a long list of files and want to focus on those with unresolved items, there's a handy option: "Click here to see a list of files that have items in suspense." This feature filters out any files where all the work has cleared, leaving you with only those that require further attention. In the main Account Information image featured in this article, this filtering was applied. If you take a closer look, you'll notice that the "Registrations Suspense" column displays numbers for each remaining file.
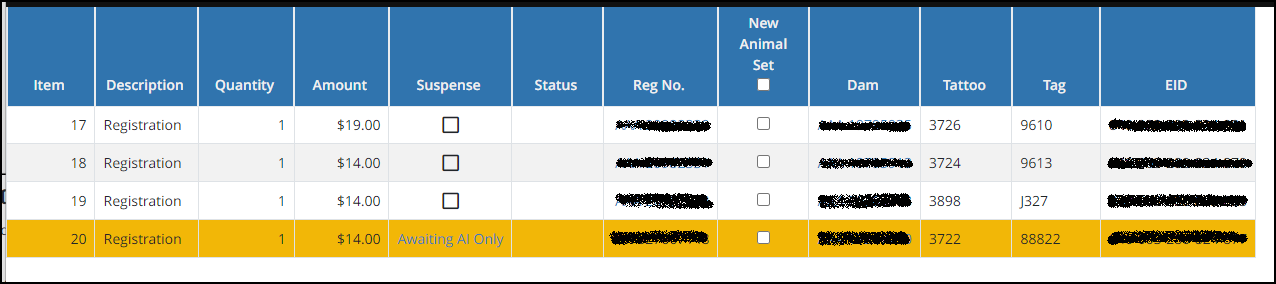
This option not only narrows down your list by file but also provides more detailed insights when you click on a specific file number. You'll be able to see only the individual items within that file that are still in suspense, making it much easier to pinpoint and address outstanding issues.
Another highly useful option is the "Click here to see a list of pending registrations that are awaiting A.I. Service Certificates for all files in process." This feature scans through all submitted registrations and compiles a list of those that still require an AI Certificate to be processed. I often use this option to generate a list, which I then copy into a Word document to track the number of AI Certificates I need to order for each bull.
The best part is that this feature consolidates information across multiple files, giving you a comprehensive view of all the pending AI Certificates, regardless of how many different files the registrations are spread across. This makes it easy to stay organized and ensures nothing falls through the cracks.
Managing Balances: A Guide to Payment Options
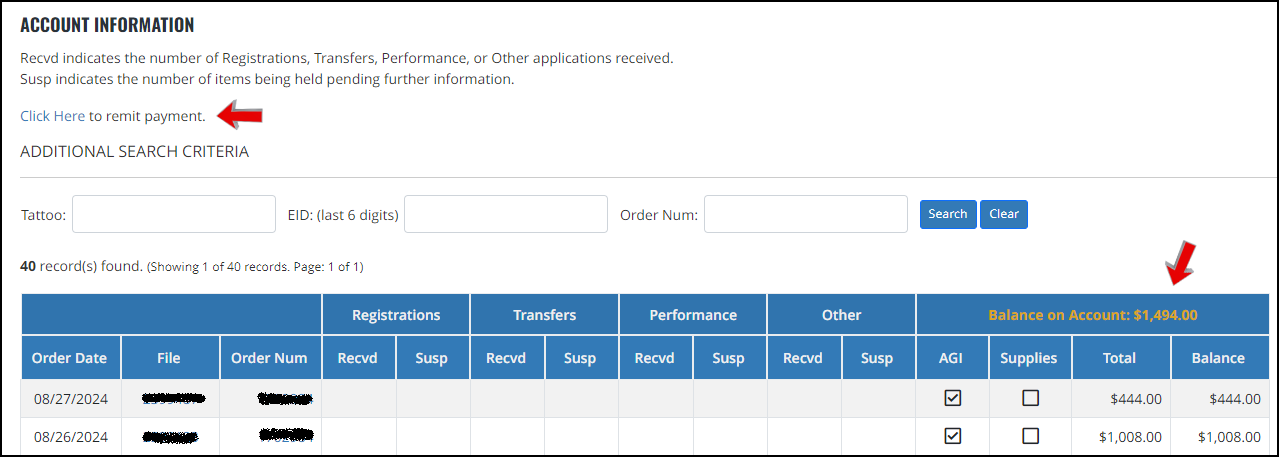
While exploring the search options, it's worth taking a moment to glance above the grid or in the top right corner to check if there's an outstanding balance on any of your files. If a balance is present, a convenient link will appear, allowing you to remit payment directly.
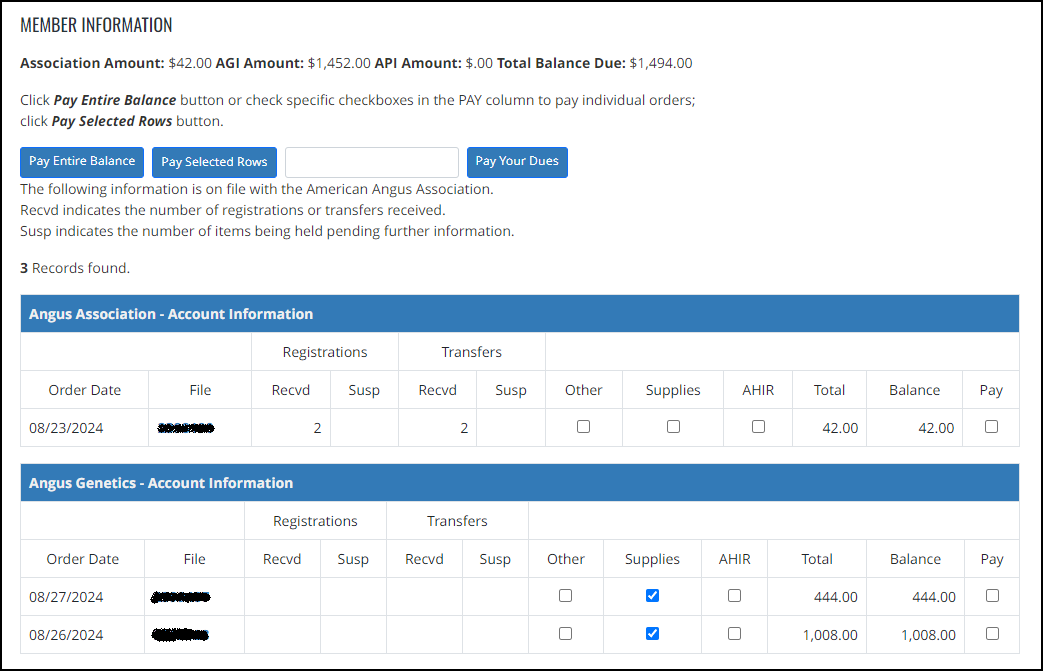
By clicking on the link, you'll be directed to a detailed payment screen where you can review the specific files with outstanding balances. This screen provides a comprehensive breakdown by entity—such as the Association, AGI, or API—as well as a file-by-file summary. You have the flexibility to either pay your entire balance at once or select individual files to settle specific amounts. This feature ensures you have full control over managing your payments, allowing you to address balances as they arise efficiently.
Detailed Order Information – More Uses than Meet the Eye
Have you ever needed to work with the same group of calves after you've already submitted some of their information? For instance, you might have entered calving records and later need to submit registrations, DNA samples, or weaning weights for those same calves.
Did you know that you can easily create or update an animal set for use in other forms by accessing specific file details? This can save you significant time and effort by reusing the data you've already entered.
To do this, locate the relevant file under Account History – Association and click on the File Number in the results list. This will take you to the detailed order information for that file. From there, you can either create a new animal set or update an existing one, streamlining your workflow across different forms and tasks.
When you're working with your results, take note of the column labeled “New Animal Set.” This feature allows you to efficiently organize and manage groups of animals across different tasks.
Above the results set, you'll find options to either create a new set or update an existing one. If you want to include all the animals from a specific file in a new set, simply click on the “New Animal Set” label.
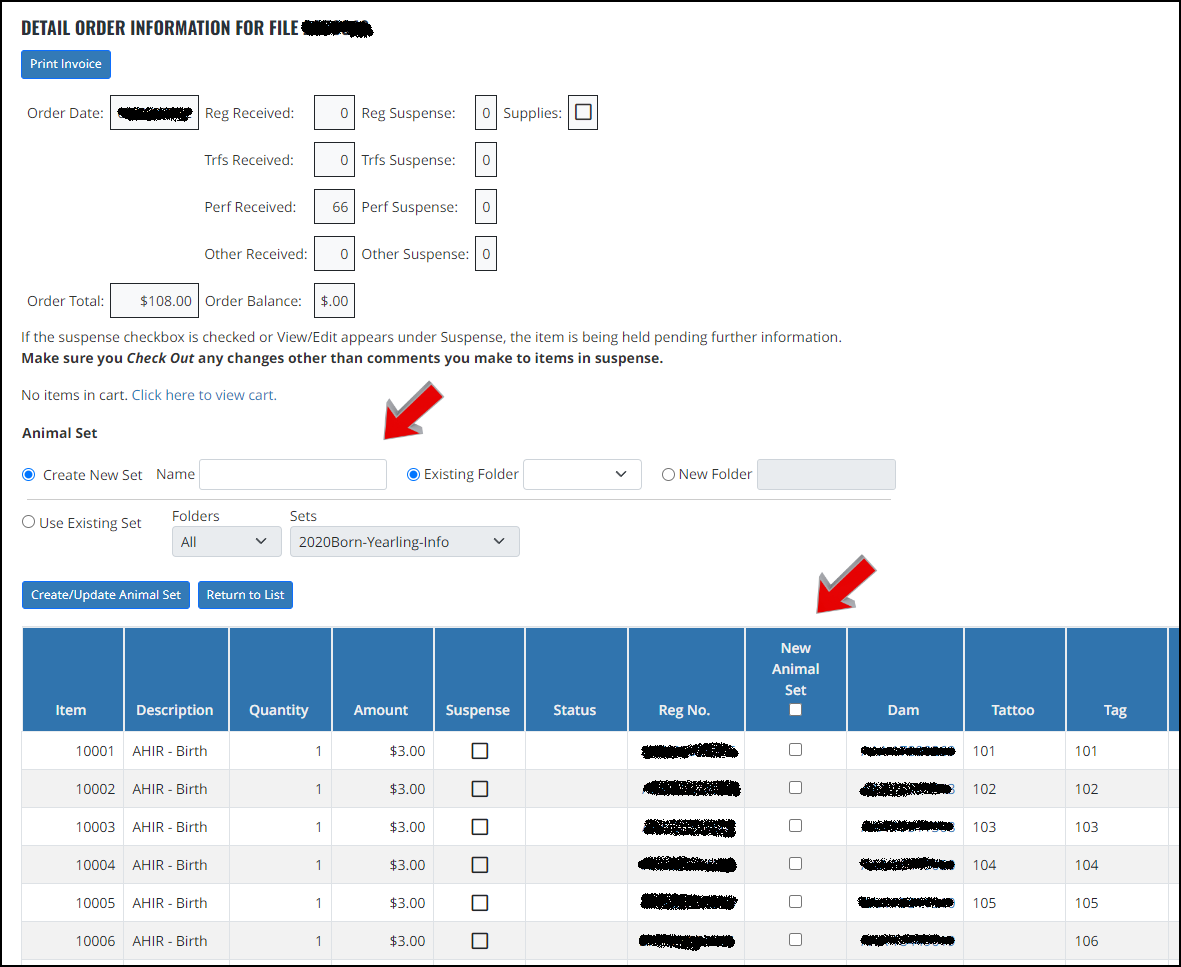
If you're only interested in including specific animals, scroll down the list and check the boxes in that column next to the animals you want to include in your set. This flexibility lets you customize your animal sets according to your specific needs, making it easier to manage and submit the necessary data.
After selecting the desired animals, complete the necessary fields to either create a new animal set or choose an existing set you'd like to update. Once you're ready, click the “Create/Update Animal Set” button.
Upon doing so, you'll be redirected to the Animal Sets interface, where your new or updated set will be ready for use. From here, you can seamlessly begin working with your animal set for any further tasks or submissions.
Some examples of how this can be used would include:
· Submit Calving Records → Send in DNA
· Submit Calving Records → Register calves
· Submit Weaning Records → Send in Yearling Records
· Submit Registrations → Custom Report
In closing
In summary, managing your registrations and transfers with the Association has been made significantly more efficient with the tools available in the My Account > Account History – Association section. These features offer a comprehensive view of your submitted data, allowing you to easily track progress, identify pending items, and stay on top of your records. By utilizing these tools, you can streamline your workflow, ensure accuracy, and enjoy a more organized approach to managing your submissions.